Strawberry Tart {Gluten Free, Raw & Paleo}

tartWhat do you do when you buy waaaay too many strawberries at Costco?

Why, you make a gluten free, paleo strawberry tart of course. This yummy little treat will serve as my dessert tonight. However, I cheated a tad (and had a slice this morning for breakfast!) It’s good. Enough said.

The recipe is pretty simple. This is a raw, grain free dessert – and no baking required. I know, it’s almost too good to be true. But, it is. No need to wake up from your dream state.

You will need: 1 tbsp. lemon juice, 4 cups sliced strawberries, 2 tbsp. natural sugar, 2 tbsp. coconut oil, 7 dried dates, ¼ cup water, 2 tbsp. maple syrup, 1 cup almonds, 1 cup cashews, pinch of sea salt, ¼ cup almond milk, ¼ cup flax seed.

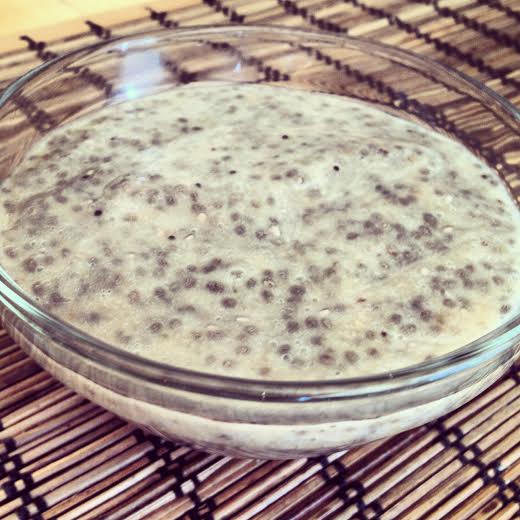
Let’s make the pie crust first. In a food processor dump in the 1 cup of almonds and ¼ cup flax – then pulse (breaking up the almonds). Add in the dates, salt and ¼ cup of water. You will need to pulse for a while to make the gooey crust. You be the judge. You might need more water – or more dates. Use your discretion.

In a pie pan, line the dish with your crust. Wet hands serve as the best to form the ball of dough around the edges – etc. Place your dish into the freezer or refrigerator so it hardens. Another option is baking it for about 10 minutes. This will make the crust flakier and baked tasting. But, again, it’s up to you!tart 2

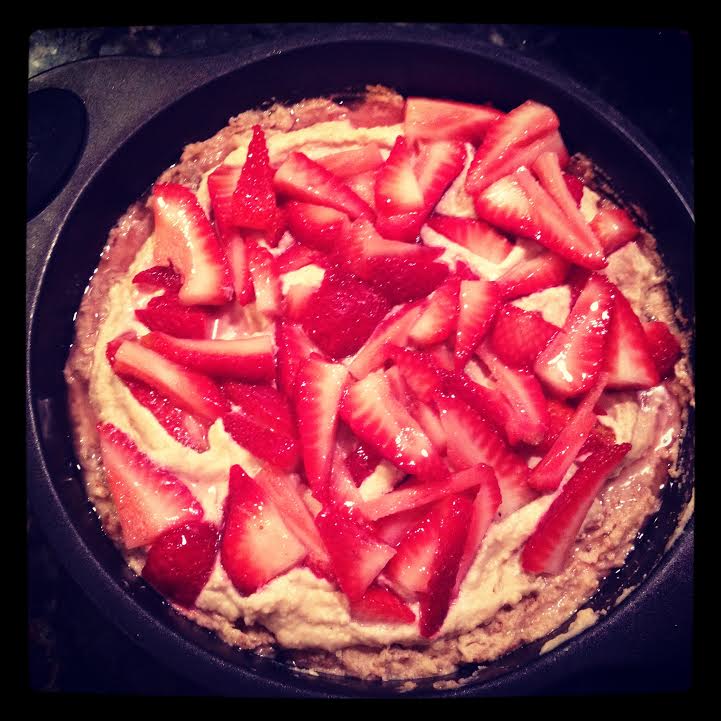
Next let’s make the strawberry glaze. Simply cut up 4 cups of ripe strawberries and place them in a bowl. Sprinkle lemon juice over the strawberries and add natural sugar on top of them. Yum – just mix the fruit up and place it in the fridge for 20 minutes or more.

For the pie creamy topping, dump 1 cup of cashews into the food processor. Pulse the cashews, making them into a coarse mixture. Add in the coconut oil, maple syrup and almond milk – pulse. This will make a creamy texture. Place in the fridge for an hour or so.

After your crust is set, spoon the cashew mixture on top of the hard crust. Next dump your cooled strawberry mixture on top of the creamy topping. You are done – a raw, gluten free strawberry tart. It’s rich and awesome. Enjoy.

Bacon Asparagus Pasta {Gluten Free}

bacon pastaLet’s talk about bacon – it’s simply delicious. Recently, there has been this bacon craze. Even to the point of some state fair’s offering, ‘Chocolate Covered Bacon.’ I am dead serious, you can see this interesting combo here.

I like bacon. But, people, it has a lot of fat in it. So, for this recipe we are going to use turkey bacon. It gives you that yummy taste with way less fat.

This gluten free pasta combo is awesome. It is so flavorful. This will become a favorite dish for dinner guests and family parties.

Everyone will love this. I mean, who does not love bacon? And you get your little pops of greens in the asparagus. Let’s get cooking.

You will need: 1 bundle of asparagus, salt, pepper, 1 package turkey bacon, gluten free pasta, 1 tbsp. pesto sauce, garlic powder, onion powder and a splash of lemon.

First, I sautéed the asparagus. Simply cut the ends off of the little green trees [because that part is tough and won’t taste good!] I sprinkled a little salt, pepper, lemon juice, onion and garlic powder over the asparagus. Really seasons the veggie well! When done, set aside in a big bowl.

Next, let’s cook the bacon. I used the same frying pan that I cooked the asparagus in. So, I could have the taste of the spices – in the meat. Chop up the bacon in little pieces and let it brown on the stove. This should not take long. Turkey bacon is a lot thinner than real bacon. Add to the asparagus bowl.

You will want to have a pot of water boiling for the noodles. Decide how much you want to place in there and cook your noodles. Gluten free noodles work the same way as regular noodles.

Once the noodles are done, strain and dump into the bowl with the bacon and asparagus. I added 1 tbsp. of premade pesto sauce into my pasta for that creamy texture. And folded all the ingredients together.

Serve and enjoy this tasty, really flavorful creation!

Greek Yogurt Dots {Gluten Free, Low Fat}

yogurt bitesI discovered the best little homemade snack out there. Children and adults will enjoy this yummy sweet treat. It’s so simple to make and you don’t have to feel guilty gobbling down this heavenly, creamy, gluten free dessert.

Don’t be worried when I tell you that these dots are Greek yogurt, they are blue because I thought it would be fun to incorporate a hint of color into this delicious snack {kids will love that part}.

You will need: 1 cup of greek yogurt {0 % fat}, 1 heaping tablespoon of agave nectar {or honey – if you desire}, 1 drop of blue food coloring {or any other color}, and a ziploc baggie. 

I’d stray away from really reddish hues in the food coloring department, especially for children. However, I am not a child and any type of red food color makes me have a deep headache.

Read about food colorings, here. 

All you need to do is put your 1 cup of yogurt into a mixing bow, add the agave nectar along with the drop of color and stir this sweet mixture up.

With a big spoon, dump the yogurt mixture into a plastic baggie. Make sure all the yogurt is in the bag and pushed all the way to one side.

With scissors, cut a tiny little hole in one of the corners of the bag {the side you squished all the yogurt to!} This will be your tool for making your dots. All you have to do is gently squeeze on the bag – and a nice little dot will form.

Line a cookie sheet with parchment paper and just squeeze little rows of dots onto the pan. When it’s filled up with your beautiful yogurt treats, simply set the pan in the freezer for about an hour.

Once the dots are frozen, use a spatula to get them off the pan and place them in a nice little bowl for others to enjoy.

Sautéed Brussels Sprouts {Gluten Free, Guiltless}

ImageWell the sun is shining is again, thankfully. This little butterball hid way too long. Sun equals fresh veggies, bathing suits and sand – to my mind anyway.

Last night, I made a heaping bowl of Brussels sprouts. I just love the savory crunch and rich taste of this lean, green vegetable.

Cooking them is easy. All it takes is a few simple spices. And the result is mouthwatering goodness.

You will need: 1 bag of Brussels sprouts, salt and pepper, garlic powder and 2 caps full of olive oil.

I chopped each little sprout in ½. So just take your knife and half them. This way they are easier to eat and sauté. Pour your olive oil into the pan and let that heat up.

Just dump your little veggie bites in the hot pan and stir. Use the salt and pepper to your taste buds content. However, I used about ½ a tbsp. of pepper and like a pinch of salt.

Sprinkle about 1 tbsp of garlic powder into your mixture. Continue to use the spatula making sure the little sprouts are getting toasty and brown.

Let them sauté for about 15 minutes. Then let them cool in a pretty bowl and enjoy.

This veggie is so healthy for you. Not only does it provide your body with vitamin C, it also contains loads of fiber and is a part of the disease fighting cabbage family. Read about the benefits, here.

Cocoa Greek Yogurt {Gluten Free, Low Calorie}

ImageThe App ‘Lose It’ is a lifesaver. Seriously. I have been using this app on my phone for the past week and it really helps me track my calorie intake.

Since, I am trying to eat within a set number limit, I have been experimenting with food in a different way. Taking those pesky calories into consideration. Strictly. Pain – but it’s a science.

This sweet little hunger saver gives you a hint of chocolate – for those of you who have a sweet tooth. The fresh strawberries provide a sweet, tart taste as well.

You will need: 1/2 cup 0% fat Greek yogurt (70 calories), 1 tbsp. cocoa powder (30 calories) and 3 big chopped up strawberries (13 calories). 

All you have to do is mix in the cocoa powder into the yogurt. It may take a little more time than you think because the powder is chalky and takes time to gel. I also mixed in the berries – so the chocolate goodness covered them. Left one on top for aesthetics.

You can eat this for a little snack or a yummy dessert after dinner. All for 113 calories. Remember, you can always add honey or a pinch of sugar if this is too bitter for your taste.

Homemade Ranch Dressing {Dairy Free, Gluten Free}

ranchSo you love ranch, but you are trying to eliminate dairy from your diet?

Yikes – how can you eat salad and your veggies without this delicious nectar from the ranch gods!?

Don’t freak out. You can make a copycat ranch that is yes, dairy free. It’s almost too good to be true. But, it is.

And, to add the little cherry on top – it’s gluten free too! Rejoice.

You will need: 1 cup almond milk, ¼ cup cashews, 1 clove garlic, ¼ tsp. black pepper, ¼ tsp. dill and a couple pieces of chopped onion {this really depends on how potent you want it!}

In a food processor, add all the ingredients and pulse until the cashews are chopped up and in liquid form.

Empty into a cute little jar or spread it over your mixed salad. Yum. Now, you have some amazing copycat ranch. And, there is no dairy present in this little dressing.

Make it. You’ll love it and your body will thank you. Promise.

Zucchini Fries {Gluten Free}

zuchinni friesSo these fries were an experiment. I have never fried anything before, can you believe it? My mom taught me to cook healthy. So pretty much everything was baked or sautéed with olive oil or chicken broth.

However, these fries are way healthier than the fast food version you are going to get. They are also gluten free. I know – so awesome. You get the crunch and that fried taste.

But, I would not make frying a daily routine. However, when you get that craving – do this instead of driving to your favorite golden arches.

You will need: 2 zucchinis, ½ cup of coconut flour, 1 cup of almond meal, 2 cage-free eggs, 1 cup of oil {I used canola- do not use olive oil}, 1 tbsp. garlic powder, 1 tbsp. paprika.

First of all, chop your zucchini up into little fry strips. I may have cheated a tad because I used this little contraption I got for Christmas. Here is it – As Seen on TV Perfect Fries.  This comes in handy.

Pull out three bowls. In one bowl, pour your coconut flour. In another, your almond meal – and in the last one whisk your two eggs.

You may want to add a few spices to your almond meal. I added 1 tbsp of garlic and 1 tbsp of paprika.

In a pot on the stove – pour in your oil (like 2 inches full) and set it to high heat. Let this simmer for about 5 minutes.

While it’s simmering, coat your veggie fries in the above ingredients. So, first dip one fry into the coconut flour. You want to lightly dust it. Then coat it in the egg mixture. Lastly, roll it in the almond meal. Just lay out your coated fries on a paper towel – the next step is frying.

Use metal tongs to help you in the frying process. Drop 1-5 fries in the boiling pot for not very long. You want to keep them in the pot until they are golden brown. Mine browned in like 30 seconds.

Repeat this process until all your fries are toasty. There you go – a healthier French fry.

Chia Banana Pudding {Gluten Free, Dairy Free}

banana chia puddingHoly cow, this is easy to make! It’s seriously a 3 ingredient process and super, super yummy.

Move over banana pudding with loads of milk and fat. This is the skinny girl version.

Take this to parties. It’s that good, and I am being honest with you. Or just enjoy this at home as a guilt free dessert. I had it as a little breakfast treat. Yum.

You will need: ¼ cup almond milk (you can also use coconut), 2 tbsp. chia seeds, 1 ripe banana.

Yep. That’s all folks.

Place the milk, seeds and banana in a food processor and blend it up. After this process is complete, pour the yumminess into a bowl and set in the fridge for about 30 minutes.

This allows the chia seeds to expand (so they won’t be crunchy). And also for the milk and banana to gel.

Try this – and have fun with it. This will be your favorite dessert, if you love banana pudding like me. And – score its gluten free! Awesome.

Broccoli Avocado Salad {Raw, Gluten Free}

raw broccoli saladThis is a wonderfully fast and delightful lunch. In keeping the broccoli raw – you keep in lots more nutrients and you give that salad the necessary crunch that is needed.

This is sure to fill up your tummy and satisfy those cravings. Throw this together before you walk out the door in the morning, and you are set for a low-fat, highly nutritious lunch.

You will need: 1 head of broccoli (chopped into small pieces), 1 handful of almonds, ½ large avocado (cubed), 1 tbsp. Dijon mustard, 1 cap full of olive oil and 1 cap full of apple cider vinegar.

First, chop up your broccoli into tiny little pieces. Remember you are eating this as a salad – so keep that in mind while dicing these green baby trees.

Next cut open an avocado and use half of it {preferably the side without the seed}. Use the seed side tomorrow for lunch {keeping the seed in helps the flesh stay fresh an additional day!}

Add your Dijon mustard to the broccoli bowl and stir. Then dump in those avocado pieces. Splash in the oil and vinegar and mix again. Lastly, add your handful of almonds to the top of your salad.

Enjoy this refreshing raw salad! Your body will thank you.

Quinoa Burgers {Gluten Free, Vegetarian}

unnamed (8)Hello meat alternative to a burger! Oh my goodness, this fake burger is delicious. Seriously, move over store bought veggie burgers even.

These tasty gluten free quinoa burgers were so simple to make. I doubted their incredible flavor; yet – there was no reason at all to doubt.

Dallas, my sweet puppy, even liked them. Dropped one on the floor. Yikes. And my furry fellow gobbled it up. No worries; and, hey – he’s a picky eater.

You will make this over and over again. It will be a staple to your gluten free diet!

You will need: 2 cups cooked quinoa, ¾ cup parmesan cheese, 1 carrot – grated, 3 cage free eggs, 3 tablespoons gluten free flour, ¼ yellow onion – chopped, ½ tsp. stevia, ¼ tsp. black pepper, ¼ tsp. cumin, a pinch of salt and ¼ tsp. garlic powder.

This is simple to make. Add the cooked quinoa into a large mixing bowl. Dump in all your dry ingredients. Then stir them all together.

Add the eggs in last – and make your burger mixture into a nice, wet little blend. You will be able to smell the richness – before cooking.

On the stove, put two tsp. of olive oil in to a frying pan. Let it heat up.

Make your quinoa burger mixture into little patties with your hands. I made all the mixture into patties first before frying. Because these little suckers cook fast!

Set patties one at a time into the frying pan. Let each burger sit for about 3 minutes on each side. You be the judge, the hotter the pan is – the faster it will cook. Cook all patties like this.

Yay – this is all you need to do to make fabulous gluten free, vegetarian burgers!