Roasted Rosemary Red Potatoes

Image
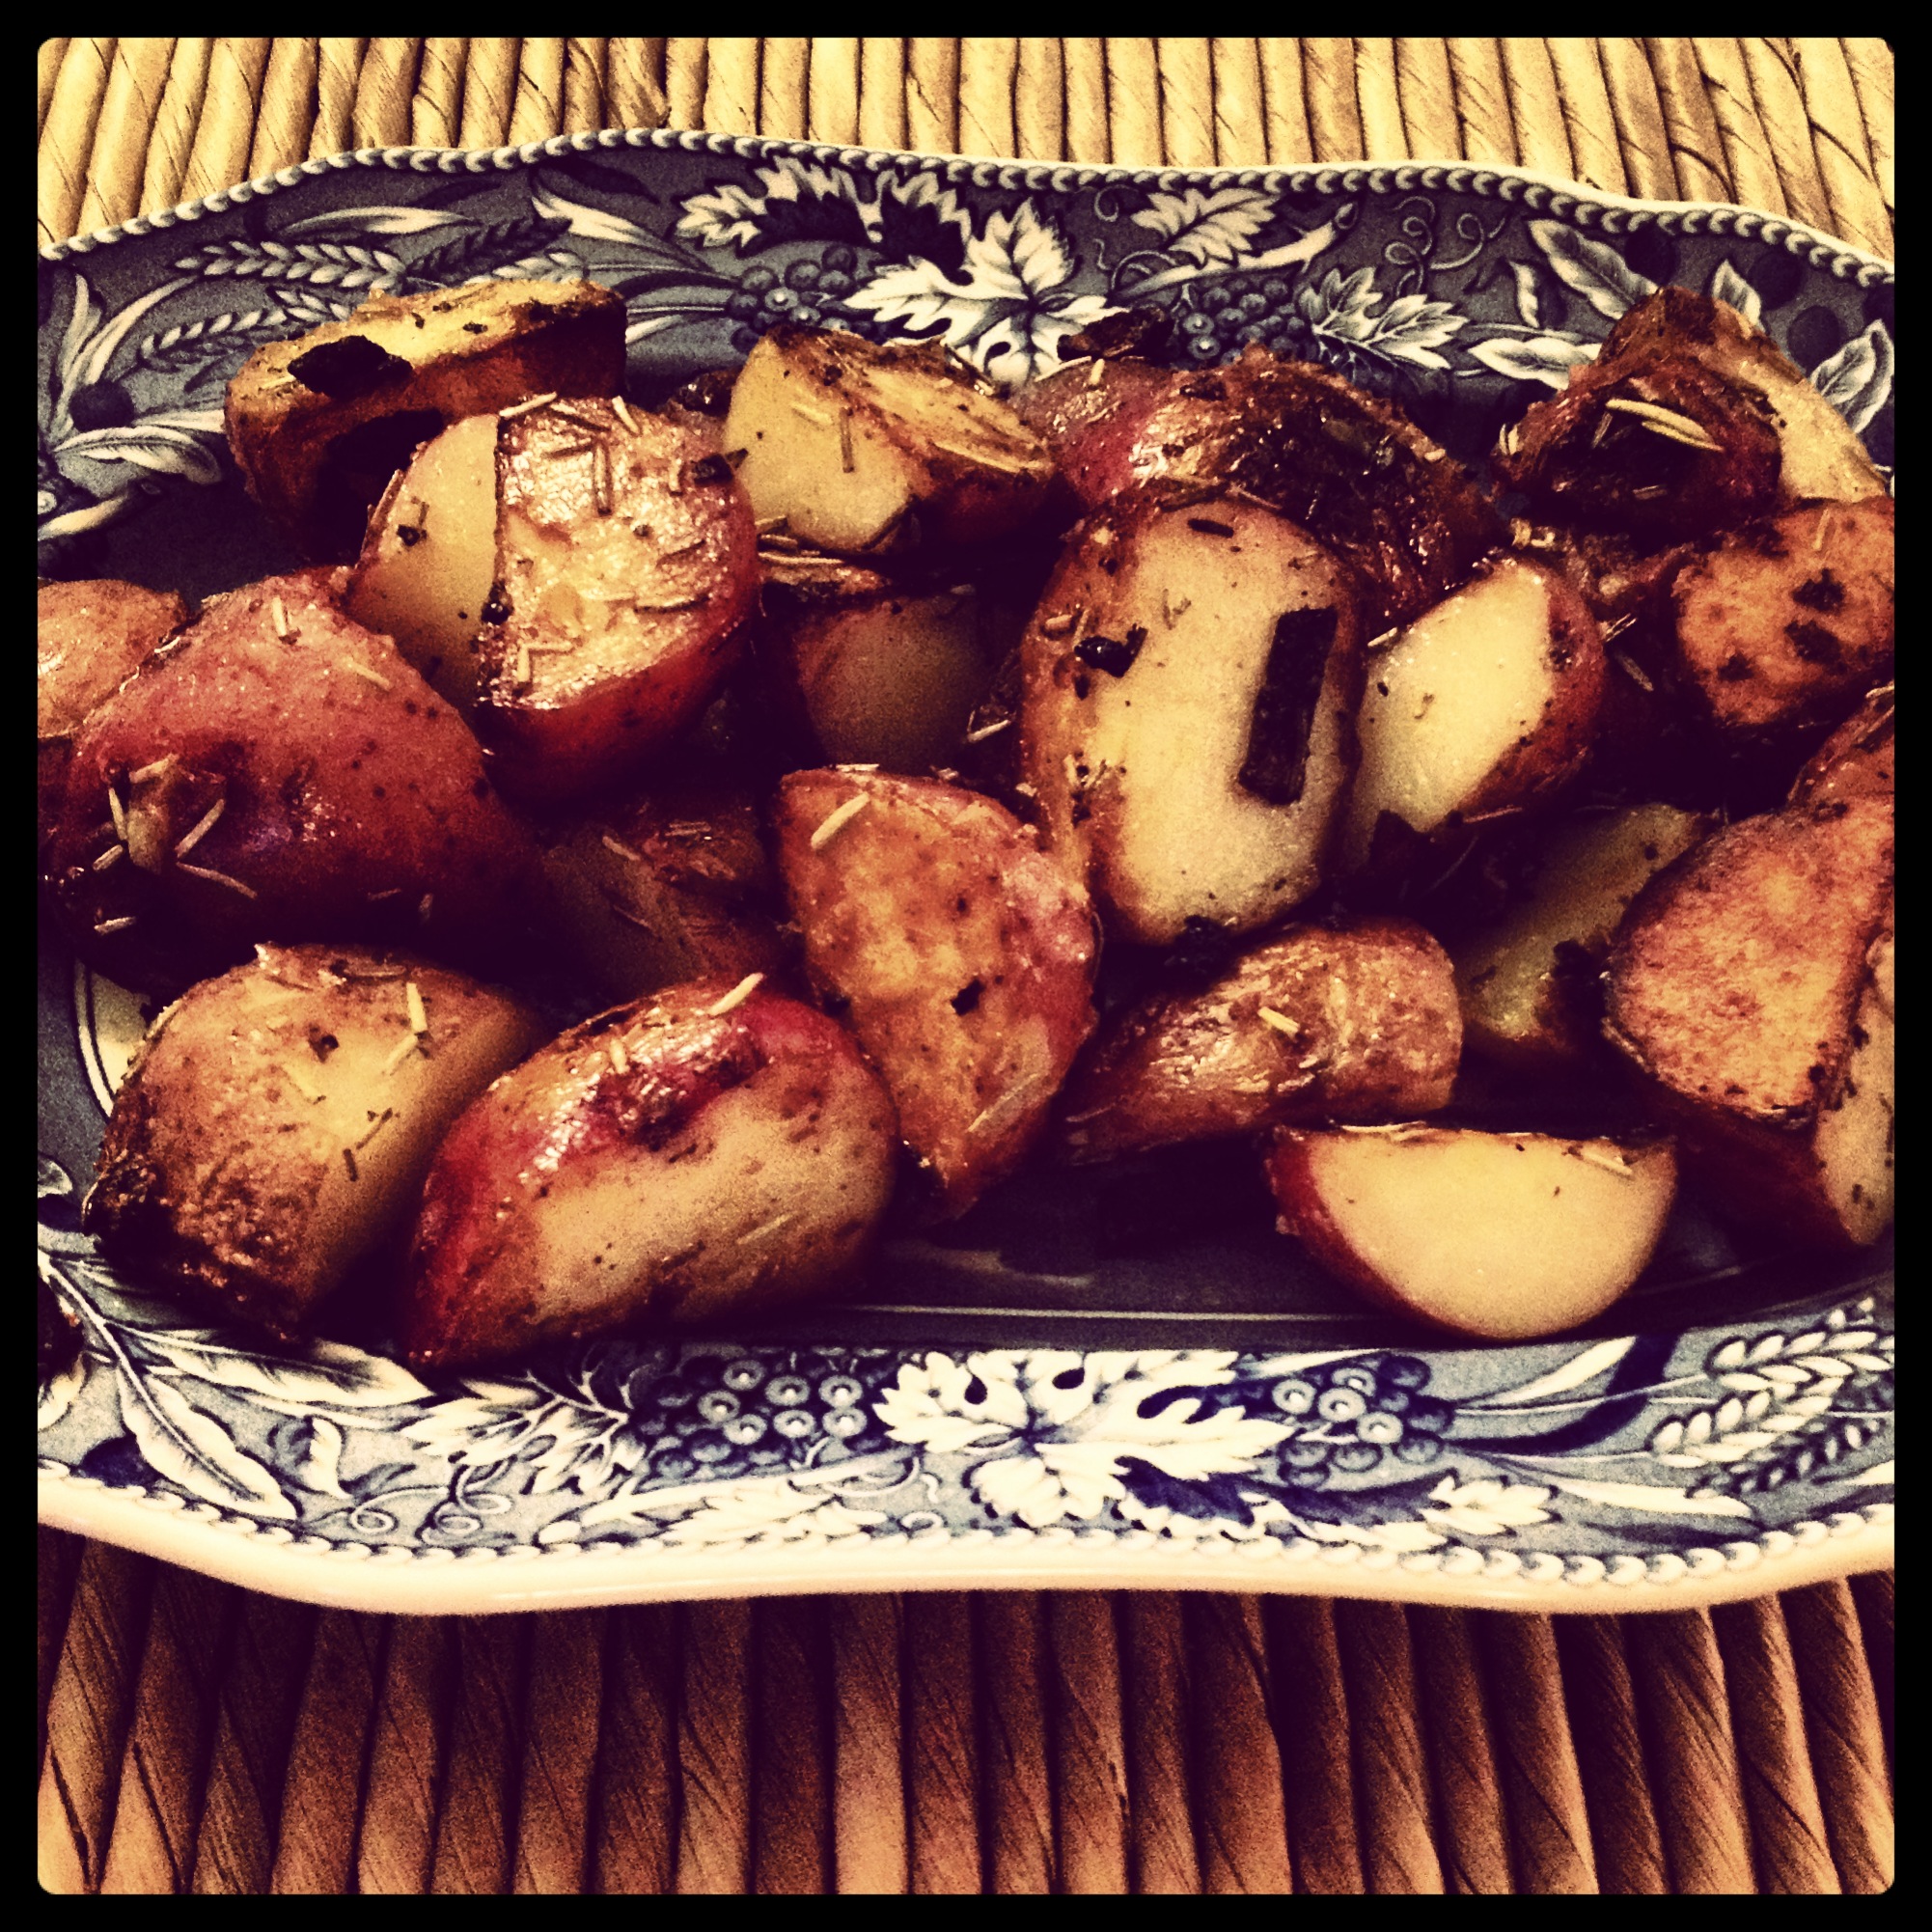
So, I got a craving for potatoes last night. Not just any potatoes – ones seasoned with garlic and rosemary. Something about these seasonings reminds me of Thanksgiving or holiday cheer. The smell is lovely.

This little dish was perfect for a cold, dreary night in the nation’s capitol. It’s simple to make and it’s a feel-good meal that will remind you of your mother’s southern cooking (minus the creamy butter that packs on the fat.)

This is a light, guilt free dish with bold taste and it’s naturally gluten free.

Also, did you know that rosemary is rich in iron, calcium, and dietary fiber? It aids in digestion and is known to enhance memory and concentration

You will need: 7 red potatoes (sliced in 4 wedges each), 2 tbsp. dried rosemary, 2 tbsp. garlic seasoning, ¼ small onion, 1 tbsp. olive oil, salt and pepper to taste.

On a cooking pan, dump in your olive oil and let it sizzle. Pour in the chopped onion and brown for about 2 minutes to bring out the flavor. Dump in the potatoes wedges and sprinkle the rosemary and garlic powder over these sweet veggies.

Cook for about 15 minutes on the stove – you might want to cover them with a lid (to keep in the moisture and steam). Season with salt and pepper to taste. Yum! Eat up.

Gluten Free Garlic Parmesan Quinoa

ImageLast night was my first time to eat quinoa. Fair to say – I probably sound like a horrible gluten free eater for admitting that. But, the look of this ‘grain’ was not really appetizing to me. It really looks bland and uninteresting in the package.

However, I was wrong (that is a common trend for this blog!). Quinoa is superb – it’s delightful.  I was literally scrapping the bowl for more after my plate was gone.

This recipe for gluten free, garlic Parmesan quinoa is fantastic. It tastes a little like gourmet macaroni and cheese. Obviously without the noodles; but, this really could be a great substitute for this staple all-American dish.

You will need: 1 cup quinoa, 1 tbsp. olive oil, ½ onion, 2 cups water, 2 cloves garlic, ¾ cup Parmesan (don’t worry, it does not have to be fresh), 2 tsp. dried basil, salt and pepper to taste.

First, pour the olive oil into a cooking pot on the stove. Let it simmer. Cut up the onion and the garlic. I simply threw them in the food processor. Then dump these chopped up flavor pieces into the cooking pot. Brown your onion and garlic for about 2 minutes.

Next pour in the water and quinoa into the cooking pot. Also add in the basil. Stir this mixture a little and cover the pot for about 15 minutes. This will let the quinoa cook.

You will know it is done – when all the water is absorbed in the pot. The quinoa also will look clear in the center of the grain. Dump the Parmesan over the quinoa mixture after it’s fully cooked.

Sprinkle salt and pepper to taste and serve. Enjoy your delicious gourmet tasting gluten free, Italian dish. You are sure to make this again. Promise.

Oatmeal Pancakes {Gluten Free}

ImagePancakes warm your soul. I think I should trademark that as a quote. I love experimenting with various recipes to find the perfect gluten free pancake. I think I might have discovered it. These pancakes were not only filling – they were wholesome.

I felt like I was on a farm, sitting at the wooden, crude table with a glass of milk and silky bonnet on – eating breakfast before having to milk the cow!

These were fresh and mouthwatering good. I can’t remember the last time I had wheat – but honestly, I would choose these sweet pancakes over Ihop any day of the week or weekend!

You will need: 2 cups gluten-free rolled oats, 1/2 cup gluten free vanilla whey protein powder, 2 tsp. baking powder, ¼ tsp. baking soda, ¼ tsp. sea salt, 4 tbsp. coconut oil melted, 2 cage free egg, 3 tbsp. agave nectar, and 1 cup skim milk (or almond, coconut, soy).

These are simple and easy to make. In one mixing bowl, place all the dry ingredients – oats, whey protein powder, baking powder, baking soda and sea salt. Gently sift this mixture together.

In a separate bowl, add all the wet ingredients. Crack in the eggs, melted coconut oil, agave nectar and skim milk. Mix this up pretty well. Pour the dry mixture in with the wet and stir it up.

This will create your batter. On a frying pan – grease it with coconut oil (just a tablespoon). And spoon out the pancake mix (like you would with regular batter!) Flip for perfection – so it’s gold on both sides.

Bonus: to keep the pancakes warm, heat your oven to about 200 and line a cookie sheet with foil. After each pancake is done on the skillet – place them in the warm oven – and serve hot with a little light syrup!

Gluten Free Avocado Spring Rolls w/ Peanut Sauce

spring rollsI always see these in grocery stores and they look so hard to make. However, I attempted to make my own this weekend, and they turned out pretty yummy. Even made my own gluten free peanut dipping sauce! Superb!

Y’all it’s so simple. You will want to make a bunch for the week – and take these to work for multiple lunches. Healthy, fresh – fantastic!

First, you will need: lettuce, avocado, cucumbers and mint leaves. Optional ingredients include: shredded carrots, glass noodles.

You will have to buy the special rice paper from a grocery store. It is cheap and really easy to find. Prepare a round cake pan with hot water (not too full). Take one piece of rice paper out of the package and set it in the cake pan. Let it soak for about 2 minutes.

Gently pick up the rice paper and set it on a wet (not too wet) paper towel. This is so the paper will not break or tear. Place all your ingredients inside – lettuce, mint leaves, sliced cucumber and avocado.

Now slowly cover the veggies with one side of the limp rice paper and roll it up. You may need to practice with technique. I am still practicing as well!

For the sauce – just put 1 tbsp. of peanut butter in a bowl and mix in gluten free Bragg Liquid Aminos. Yum, now you have the perfect dipping sauce.

Gluten Free Butternut Squash Gnocchi

ImageIf you are a pasta lover, but, sadly, gluten free – this is the dish for you. I tried to recreate a wonderful dish I had in New York last month on a business trip.

That dish was not gluten free (shame on me). And, I felt horrible after eating it – but it was delicious.

However, this gluten free gnocchi (made from scratch, mind you) was just as good!

I used butternut squash because I had it in the kitchen. Yet, I feel like it is a little bit lighter than potatoes and tastes just as good. So, c’mon cooks, this is a process; but, you will feel like a bonafide chef afterward.  Seriously.

You will need: 1 butternut squash, dash of cinnamon, 1 tbsp. poultry seasoning or sage, 1 cage free egg, dash of ground red pepper, dash of salt and pepper, dash of olive oil, 2 ¼ cups of gluten free all-purpose baking flour. And a mix of pesto sauce. If you don’t have this or don’t want to buy a mix, read how to make it – here.

First, cut the squash in half and scoop out all the seeds. You do not want to bake those. Preheat the oven to 400. Set the squash on a lined cooking tray (fleshy side up) and sprinkle olive oil, salt and pepper across the meat of the squash. Place in the oven and bake for about 30 minutes.

After the squash is done. Let it cool a little while – and scoop out the flesh. You can either mash it up with a big fork or put it in the food processor. I put it in the food processor. Empty the mashed up meat of the squash into a large cooking bowl.

Add in egg, poultry seasoning, cinnamon, red pepper and 1 cup of gluten free flour. Stir this up. And gradually add in the remaining flour until your mixture is thick and creates a nice little ball. You may need to add more flour. Use your judgment on this.

Make sure there is a boiling pot of hot water on the stove. Let it boil for a little bit – while you fashion your gnocchi pieces. You want the pot super boiling hot!

gnocchirecipe_07

The uncooked gnocchi should look like this. Photo courtesy of: 101 Cookbooks

Roll out the dough ball on wax paper coated with flour (similar to cookies). I rolled the dough into two long ropes – and sliced the rope in little pieces with a cutting knife. Then pressed my fork into the dough making a nice little line design – like peanut butter cookies!

You are almost done – drop the dough pieces one at a time into the boiling pot of hot water. I would not cook more than a dozen at a time. They cook for about 4 minutes – then will float at the top of the pot when done.

After all the gnocchi is done – coat with your pesto. And, you have a gluten free masterpiece made from scratch! Viola!

Gluten Free Mozzarella Sticks

ImageI am literally jumping for JOY! Finally there are cheese sticks that this gluten free girl can eat. I am a lover of cheese. That might be my diet downfall at times.

However, these GLUTEN FREE BAKED Mozzarella sticks will have you jumping in exuberance too. They are lower in fat (totally baked) and there is no trace of wheat on them.

I paired these with my Zuppa Toscana soup the other night and it was suburb. I thought I was treating myself to a rich Italian dinner without the wheat or the fat!  Let’s get cooking.

You will make these over and over again. My boyfriend (who is not gluten free – asked for them – two nights in a row!) I think that is saying something for these little scrumptious cheese sticks.

You will need: 6 low fat string cheese sticks, 2 cage free eggs, 1 cup gluten free flour, 1 cup baking corn flakes and 2 tbsp of Italian seasoning.

First, cut the string cheeses in half – this should yield 12 baby cheese sticks. Next pour the gluten free flour in one medium soup bowl, the corn flakes in another bowl (mix in the Italian seasoning with the baking flakes) and crack the eggs in a third bowl. You should have three bowls in front of you full of diverse ingredients.

INGREDIANTS

Your bowls should look this this

Take one mini cheese stick and roll it first in the gluten free flour, then in the egg batter and finally in the corn flake, Italian seasoning mixture. Set aside in a separate container – and do this process to the remaining 11 sticks.

Set all of them in the freezer for about 10 minutes. This gives the batter a chance to stick on well.

Preheat the oven to 375 – and place the cheese sticks on a cookie sheet. Bake for about 8 minutes. Watch them frequently because they will cook quickly.

Serve with a bowl of marinara sauce. There you go, baked, gluten free mozzarella sticks. Simple, easy and delicious!

Make Your Own Olive Garden Zuppa Toscana Soup

zupa toscanaSo, this may not be the healthiest thing in the world, but made this soup last night and it tastes just like Olive Garden’s Zuppa Toscana.

Don’t believe me, you have to try this! It is pretty simple to make. Takes about 1 hour and a half. Be patient – because your taste buds will thank you, believe me!

All the flavors are excellent. You can make a whole bowl and eat off it for a week! And it’s gluten free!

You will need: 1 pound Italian sausage (make sure it’s gluten free), 2 cloves garlic, 2 large russet potatoes, 1 small onion, 2 cans gluten free chicken broth, 2 handfuls kale, 4 cups water, 1 cup heavy whipping cream, a dash of crushed red pepper, and  a little bit of salt and pepper.

First chop the Italian sausage in little pieces and brown them in the soup pan. Add a little dash of olive oil to help the process. Add in the chicken broth and water to this bowl and cook on low.

meal

After scrubbing the outside of the potatoes in the sink, cut the potatoes in little pieces and put them in a separate bowl.

Add in the garlic cloves and onion bits (I put these in the food processor) and put them in a frying pan. Brown this batch for a bit and dump it into the broth mixture on the stove – including the potatoes.

Stir in salt, pepper and some crushed red pepper – to taste. Some might like it spicier. So, add in more red pepper!

Cook for about 30 minutes or until potatoes are pliable and tender. Add in the kale and cup of heavy whipping cream. Please stir in kale and cream last – that way the kale will keep it’s pretty green color!

Cook for another 15-30 minutes. Monitor the soup and taste for flavor.

Enjoy your almost Olive Garden soup!

Healthy Avocado Toast

ImageI love Saturday mornings. First of all – no work (sometimes) and a quiet morning just drinking coffee and watching TV {OK, I will try to throw a workout in there!}

There is nothing better than not having an agenda, lounging in yoga clothes, watching Food Network and making a quick, yummy breakfast.

My sister – the awesome blogger for The Veggie Girl – introduced me to this quick, simple breakfast that has become one of my favorites.

It basically has one ingredient and takes no time at all to make in the morning. It’s healthy and fills you up for hours!

All you need is a toaster, one small avocado, gluten free bread, salt, pepper and lemon juice. Yep, that’s all. And, of course, if you are not gluten free – you can substitute the gluten free bread for some healthy maybe Ezekiel 4:9 bread.

First of all, cut the avocado and hollow out the insides. Place the insides of the avocado in a bowl and mash it up with a fork. I don’t have a toaster, but the broil option on my stove is a lifesaver. I just set two pieces of bread in the oven and heat them for about 3 minutes.

Then spread the avocado mixture on your toast, sprinkle it with a salt and pepper and squirt a little lemon juice over the toast. Now, you have a filling, healthy Saturday morning breakfast! Complete with a warm cup of coffee.

PS: I will post later this afternoon on how to make a $1 pocket square. Stay tuned!

The Best Gluten Free Breads

sandwhich

One of my favorite combinations is turkey, avocado, lettuce, Munster cheese and light mayo (pictured above).

I have been eating gluten free for about 4 years now. It’s hard to believe it’s been that long, honestly. But, it has changed my life. No more worrying over unwanted mystery skin problems – or unnecessary bloating.

It’s funny that eliminating wheat from your diet could so dramatically alter your life; but, my life is altered!

I do miss a few things like my lovely turkey Reuben from Jason’s Deli or dining at The Olive Garden and eating those bread sticks. However, when I think about how my body feels, it is hard to miss these things for long.

That being said, there are some nights that I just want a sandwich for dinner. Thankfully, there are many fantastic gluten free bread options out there – so my craving can be satisfied.

It really does make a difference what brand of gluten free bread you use. Some can ruin your sandwich, if they taste like paper. Here’s a list of some of my favorites – that actually give real bread a run for it’s money:

1. Udi’s Whole Grain Bread

This is by far my favorite gluten free bread. I get this at Trader Joe’s and typically buy two loaves (put one back in the freezer). It really tastes so similar to real bread. It will have you thinking you are biting into a slice of the authentic stuff.

2. Udi’s White Sandwich Bread

This is my second choice –if I can’t find the whole grain stuff. With the Udi’s brand you can’t go wrong. If you are a Wonder Bread lover – this is the gluten free bread for you. Hands down.

3. Food For Life White Rice Bread

This one is pretty good. If I remember correctly, the sizes of the slices are a little bit smaller than Udi’s. But, it tastes pretty good. I recommend using this for sandwiches. Tried making toast one time with this bread and ended up getting a baby piece – it shrunk so much in the toaster. But the taste is good.

4. Food For Life Brown Rice Fruit Juice Sweetened Bread

This one has a sweeter taste. For the sweet lover, this might be the best option. It is not an overpowering taste. It just offers a hint of fruit juice flavor with every bite. This would be the perfect bread for a cream cheese, strawberry sandwich.

5. EnerG Tapioca Loaf

The texture of this gluten free bread is a little frustrating. It is a bit crumbly. The flavors are also a bit different from that of regular gluten free bread. However, I would not rule it out. Some people may like a little bit of a drier tasting sandwich.

Gluten Free Banana Bread Cookies

ImageIt’s game day. I was just itching for a cookie this afternoon. Cowboys, Redskins both playing today –ah, the excitement! Sometimes you just have to munch on a sweet treat. However, with this awesome recipe, you can munch all you want guilt and gluten free!

I got this recipe from ‘What Runs Lori’ blog. I modified it a little bit – for my taste. I call them Banana Bread Cookies! These cookies are fantastic ladies and gents. You will be making these for parties, events, the office – whatever floats your boat. They are even good for breakfast. A cookie – for breakfast!? That’s right. OK, let’s get cooking.

You will need: 1 cup coconut flour, 1 tsp baking soda, 1/4 tsp baking powder, 1 tsp sea salt, 2 ripe bananas, 1/2 ripe avocado, 1 cup almond milk (or milk of choice), 4 tbsp honey ( I put in an extra one!), 1 tbsp apple cider vinegar, 2 tsp vanilla extract, 2 cage free eggs, 1/4 cup shredded coconut.

game day

Disclaimer: I only root for the Redskins when they do not play the Cowboys. This Texas girl has standards.

You do not have to add coconut shreds, believe me – I know some people are not wild about coconut. You can try cranberries, chocolate chips or maybe walnuts!

First, mix in all the dry ingredients into a little bowl. Put in the flour, coconut shreds, baking powder and soda, sea salt.

In a separate bigger bowl, pour in all the wet ingredients. You might want to mash up the bananas and avocado before adding in the milk, vanilla, honey, apple cider vinegar and eggs. Stir all together.

Combine the dry ingredients with the wet ones. Mix in – make sure there are no green clumps from the avocado. And, preheat the oven to 375.

Make the mixture into little balls – and put them on a cookie sheet. Bake for 20 minutes.

Now, you have some crowd pleasing game day cookies. Guilt and gluten free!