Be Brave. Fear is Not A Friend.

Image
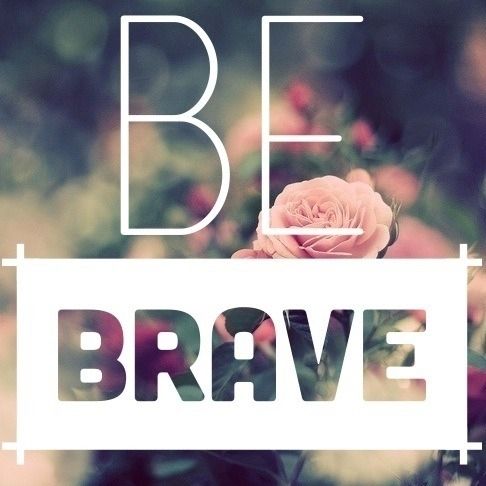
I like this message – ‘Be Brave.’ I am definitely not a woman’s lib type. I mean, I think women should work if they want to, that they can acquire their dreams…etc, etc. However, I do not feel like we are persecuted and jilted from the working world.

Heck, women have kids and it’s natural to stay home with them (I will refrain from getting into this) – yet, bravery is a beautiful message to pass on to women of all ages.

This concept makes me think of the Disney/Pixar movie “Brave.” I not only like this movie – because the heroine has red, curly hair, but she is the epitome of the word that means ‘courageous.’

I would like to picture myself like her – riding care-free in the wind, jumping off waterfalls and fighting vicious bears. It would be great to fling out my bow and arrows in assurance and accuracy at every menacing surrounding noises.

Yet, fear holds us back from a lot of things in life. The terror of the unknown, the uncertainty of the future or the possibility of an unfavorable outcome tends to stop want-to- be-warriors in their tracks! This is upsetting. Warriors were meant to strap up their battle armor – not cower in fear, afraid to move.

I tie everything back to Biblical concepts because of my Christian roots; but, what would have happened if David was too nervous to face the giant Goliath? What would have taken place if Joshua ignored God’s charge to ‘Be strong and courageous’? What if Queen Esther was too afraid to confront her husband, the King?bra

Fear is mind numbing; but, it should never hold us back. After all, dear one – God has “not given you the spirit of fear but of power and of love and of a sound mind.” (2 Timothy 1:7)

If you have to repeat this to yourself – do it. We were all made to be like Merida –galloping forth with confidence, joy and promise.

You are a child of promise – never forget that.   And promise, sweet one, is greater than fear. It trumps fear and laughs at it boldly in the face. Saddle up, sit on faith and ride forward. Let the breeze blow your hair back. Be brave – you have a reason to be.

Whatever will come our way, through fire or pouring rain. We won’t be shaken. No we won’t be shaken. Whatever tomorrow brings, together we’ll rise and sing. That we won’t be shaken. No we won’t be shaken.  – Building 429

Creamy Gluten Free Dill Sauce – and Health Benefits!

sauceFish is never complete without a creamy, spice sauce. I served this homemade dipping sauce the other night with my baked salmon. (You can see the picture below!) It made the salmon taste so much better. Yum.

This is way better than any tartar sauce you purchase at a grocery store. And, it’s so simple.

You will need: ¼ cup light mayo, ¼ cup Greek non-fat yogurt, 1 heaping tbsp. dried dill (or fresh!), 2 tbsp. chopped onion, salt and pepper to taste!

dill

Lovely fish sauce in a bowl – before being mixed together.

Just simply mix all these ingredients together in a little bowl. It takes no time at all. You may need to add a little onion powder to the mix. I did – just because I thought it made it more flavorful.

Spoon this dill sauce out in little bowls and serve with some baked fish. It makes dining on fish (which is really good for you) a more pleasureful experience. And you don’t have to worry about hidden additives, gluten and preservatives.

Also an added bonus – dill is actually very healthy for you. It has been used since ancient times. It is typically used as a flavor enhancer; however, that little healthy green plant has some awesome benefits. I wanted to share them with y’all!

Eight benefits include: Aids in bone health, it’s an anti-bacterial, protects against free radicals, offers digestive benefits, treats hiccups and headaches, provides a calming effect and helps with sleep. Read about the benefits more in depth here.

Gluten Free, Garlic Spaghetti Squash

squashTaylor and I had a little harvest dinner last night. I like to have fish once a week, so this seasoned salmon with homemade dill sauce was perfect.

But the show stopper was the garlic spaghetti squash. I made a believer out of my boyfriend who typically hates squash. So, this gluten free, veggie dish has to be pretty stellar.

It literally did not take me that much time to whip this together. Went to the local Trader Joe’s and bought a $1.99 squash and the rest is culinary history.

You will need: 1 large spaghetti squash, 2 cloves minced garlic, ¼ chopped onion, ¼ cup half and half creamer, ½ cup chicken broth, salt and pepper to taste.

First, cut the squash in half. This might take some time – the exterior is pretty tough. Place the flesh side down on a baking sheet. Set the oven to 375 and bake for 25-30 minutes.

Once the squash is tender, take it out of the oven and let it cool. Then scrape the seeds and darker orange out of the center. With a fork, scrap out the spaghetti like noodle flesh from the side of the squash into a cooking bowl. Let cool.

taylor

Happy Camper!

Splash some olive oil in a frying pan and add in the minced garlic and chopped onion. Sauté for a bit then add in the squash flesh. Slowly add in chicken broth and creamer. Salt and pepper to taste. Let cook for about 15 minutes on the stove!

kimi

I will make this again!

I let the insides cool in the fridge for about an hour. Then placed the spaghetti flesh back in one side of the squash shell and lined the top with fresh mozzarella cheese. I placed the whole thing in the oven at 375 for about 10 minutes to warm up and melt the cheese on top.

Chunky Jewelry: Evening, Work & Weekend

I am such a fan of chunky jewelry. Of course, you really need to know how to wear it – so it’s not gaudy looking. Believe me, that can happen, and I think we have all been there before. Whoops – the power of trial and error.

But, you can really dress up an evening dress, plain work outfit and monochromatic weekend look with some pretty, chunky pieces. I like wearing a statement necklace with subdued earrings. Pearl or gold studs are my favorite choices.

Image

An example of a smart purchase!

I put these looks together in this chart – as an example of an evening, work and weekend look where the chunky jewels are accomplished.

However, these picks are expensive – warning.

I think it is important to wear wedges at work – to save your pretty, little feet from pain down the road. And boots with a tiny heel are ideal for weekend fun. Yet, go out on a limb when you are partying after work. Wear those stilettos. Who knows, you may just meet Mr. Right in them? You want to accentuate your assets when going out on the town!

Sadly girls, we are not all millionaires and can’t afford these exact choices above! However, I also included a picture of a purchase of mine that cost me a whopping $25 dollars: sweater, necklace and earrings included. I am going to pair it with a black pencil skirt for a cute work outfit. Thank goodness for places like Burlington Coat Factory, TJ Maxx and Marshall’s. Not going to break my bank for a pair of 1k earrings. No thank you. But, you can still look stylish and feel good about being thrifty.

Let me know what you think about these outfits! Do you like chunky jewelry too?

Dreamy Holiday Dessert Milk

ImageI will be the first to tell you that I am not a fan of milk. I like it in my coffee; however, when it comes to just drinking it – nope.

I am this way with any kind of milk: skim, almond, coconut and soy. Something about it just is not alluring to me.

However, as the season is changing, I found myself wanting a little dessert drink after dinner. Hot tea is nice, but I wanted something creamy – and this recipe fit the bill.

One of the main ingredients is milk! Thought I would never say this – but this little dreamy drink is one of my favorites now.

It is simple to make and tastes so good for those dreary, cold nights.

You will need: 1 cup milk, 1 tbsp. honey, a pinch of cinnamon, 1 tbsp. pumpkin spice, 2 caps full of vanilla extract.

First heat up the cup of milk in the microwave – you want to get it really hot (it will be frothy on top). Stir in the honey, vanilla and sprinkle on the spices!  Put your dreamy hot drink in a pretty teacup and sip up.

Top Foods That Hydrate Your Skin

hydrateIts fall and winter is coming! Winter can prove harsh on your skin. We all know water is the number one hydrator. However, there are foods that can actually hydrate your skin. You may want to think about adding these foods to your diet this winter.

We all want supple skin. And when you are getting older (you’re not 21 anymore!) a diet rich in hydrating foods will make you feel and look younger. When cooking, swap that butter for olive oil or coconut oil which are rich in Omega 3’s. You will notice a difference.

And – remember to always load up on water. Drink away. Seriously, you can never drink enough. Well, don’t drink a swimming pool – there are limits. You know what I mean. Set a drinking bottle on your desk at work and have a goal to refill it twice.

Roasted Rosemary Red Potatoes

ImageSo, I got a craving for potatoes last night. Not just any potatoes – ones seasoned with garlic and rosemary. Something about these seasonings reminds me of Thanksgiving or holiday cheer. The smell is lovely.

This little dish was perfect for a cold, dreary night in the nation’s capitol. It’s simple to make and it’s a feel-good meal that will remind you of your mother’s southern cooking (minus the creamy butter that packs on the fat.)

This is a light, guilt free dish with bold taste and it’s naturally gluten free.

Also, did you know that rosemary is rich in iron, calcium, and dietary fiber? It aids in digestion and is known to enhance memory and concentration

You will need: 7 red potatoes (sliced in 4 wedges each), 2 tbsp. dried rosemary, 2 tbsp. garlic seasoning, ¼ small onion, 1 tbsp. olive oil, salt and pepper to taste.

On a cooking pan, dump in your olive oil and let it sizzle. Pour in the chopped onion and brown for about 2 minutes to bring out the flavor. Dump in the potatoes wedges and sprinkle the rosemary and garlic powder over these sweet veggies.

Cook for about 15 minutes on the stove – you might want to cover them with a lid (to keep in the moisture and steam). Season with salt and pepper to taste. Yum! Eat up.

Winter Running Gear 101

Image

Invest in a head scarf to keep your ears warm!

The seasons are changing. Being a Texas girl, this lady has never had to bundle up for a little run. However, living on the east coast is a totally different story. You have to prepare for that 30 minute jog – especially in the fall and freezing months past December.

I never knew what a hat was for – or a head scarf for that matter. It is not just for looks or fashion, ladies. It is to protect your sweet little ear drums from getting frostbite (maybe not that severe – but you don’t want an earache.)

I put a little polyvore picture together of essentials for that wintery run. Bundle up – you don’t want to be sick.

And after that run – guzzle down some hot apple cider or cinnamon tea. Don’t put those runs on hold just because of the freezing elements. Go out in the elements, but plan ahead with proper clothing choices! Run, ladies, run!

One tip (well, a couple actually) – invest in some good running pants. These Nike ones below are great. They are a little pricey; however, they will last forever. Promise. Well, I have had mine for about 3 years (that is pretty good!) And – ankle socks are great for the summer, but in the winter, dress your feet with some serious wool socks.

Is Your Cutting Board Harboring Germs?

Who doesn’t like fresh cut veggies? I do. However, chopping up these little bits of goodness requires a cutting board. I have a cute bamboo one that I like to use for just about everything. I like the feel of it – and it looks cleaner and just more natural than the plastic colored ones. But, is it harboring germs?

The common perception is that wooden cutting boards hold ickier, little germs – but is this really true? I think there are benefits and disadvantages of wooden and plastic boards. However, let’s go to the experts to tell us what the various reasons are.

Wooden Boards: Dean O. Cliver, PhD, professor emeritus of food safety at the University of California, Davis (who has been studying this issue since the early 1990’s – this guy is no joke!) research found “that wooden cutting boards seemed to pull the bacteria down beneath the surface of the cutting board, where they didn’t multiply and eventually died off.”And although some experts say that every time a knife scratches the surface – germs reappear, Dr. Cliver’s research found that “the bacteria never reappear on the surface.”

Plastic Boards: In Dr. Cliver’s same research he found “the plastic [boards], after manual washing as I would do under my kitchen faucet, we could still recover bacteria from grooves.” The Hospitality Institute of Technology and Management has found that unless plastic cutting boards are soaked nightly in bleach, they are very prone to absorbing hard-to-remove food residues that could promote the growth of bacteria and black mold.

Now, don’t take this research (above) as the solid truth. Every cook has her favorite cutting board…etc. This is actually a highly debated topic in the cooking realm. I think it’s fair to say, stick your cutting board in the dishwasher after use. This should be a no-brainer. In the long run a wooden cutting board will hold up longer (less stains) and is defiantly a softer surface for your knives.

Gluten Free Garlic Parmesan Quinoa

ImageLast night was my first time to eat quinoa. Fair to say – I probably sound like a horrible gluten free eater for admitting that. But, the look of this ‘grain’ was not really appetizing to me. It really looks bland and uninteresting in the package.

However, I was wrong (that is a common trend for this blog!). Quinoa is superb – it’s delightful.  I was literally scrapping the bowl for more after my plate was gone.

This recipe for gluten free, garlic Parmesan quinoa is fantastic. It tastes a little like gourmet macaroni and cheese. Obviously without the noodles; but, this really could be a great substitute for this staple all-American dish.

You will need: 1 cup quinoa, 1 tbsp. olive oil, ½ onion, 2 cups water, 2 cloves garlic, ¾ cup Parmesan (don’t worry, it does not have to be fresh), 2 tsp. dried basil, salt and pepper to taste.

First, pour the olive oil into a cooking pot on the stove. Let it simmer. Cut up the onion and the garlic. I simply threw them in the food processor. Then dump these chopped up flavor pieces into the cooking pot. Brown your onion and garlic for about 2 minutes.

Next pour in the water and quinoa into the cooking pot. Also add in the basil. Stir this mixture a little and cover the pot for about 15 minutes. This will let the quinoa cook.

You will know it is done – when all the water is absorbed in the pot. The quinoa also will look clear in the center of the grain. Dump the Parmesan over the quinoa mixture after it’s fully cooked.

Sprinkle salt and pepper to taste and serve. Enjoy your delicious gourmet tasting gluten free, Italian dish. You are sure to make this again. Promise.